I made a ships wheel! Well, I painted a ships wheel. It was pretty easy to make, I used a printable because I didn't trust my symmetry skills to draw it myself. It looks super cute in my nautical corner. I hate the awkward side table in the corner, but I have nowhere else to put it. My husband told me I was at my "decorative wood things" limit for the living room. Lucky for him, I agree. So next up: bedroom remodel!
Tuesday, January 28, 2014
Sunday, January 26, 2014
DIY Kitchen iPad Stand
An iPad stand. You know you need one. Sure, my awesome green protective cover acts as a stand, but only in landscape mode! Totes unacceptable. If you're my husband you wonder how many random things I can make out of wood sticks. If you're me, you wonder how many more things you can make out of wood sticks! Anyway, this keeps your iPad upright and easy to read when cooking dinner for said husband who really needs to stop complaining about your genius projects.
Saturday, January 25, 2014
Decorative tray DIY
Another pallets project, yay! This awesome tray matches the crate in my living room. I'm thinking of repainting them but haven't committed to a color yet. I'm thinking of adding a new accent color to my living room, which as we all know is a huge decision so I'm taking my time and will update as soon as a decision has been made.
Here's the crate I made a while ago, the color is the same even though the tray looks brighter for some reason:
 |
Friday, January 17, 2014
DIY Bookcase
Saturday, January 4, 2014
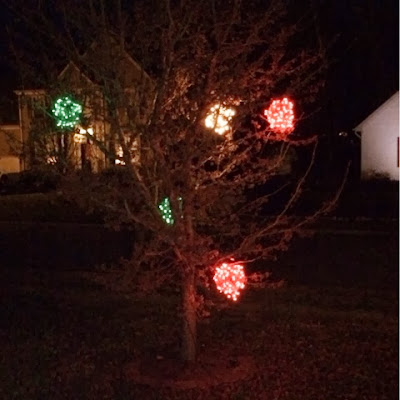
Outdoor Tree "Ornaments"
I wanted to switch up my outdoor Christmas decorations this year, and decided to make some lighted ornaments for my large tree outside. It turned out...okay. I wouldn't call it a "fail" but not my best work. I think it would have looked much better if there were a lot more ornaments, but I would have had to spend so much more money on extension cords (one for every ornament...that adds up!)
I started out by cutting sections of chicken wire, and forming them into (roughly) round shapes. Then, I wrapped a string of 100 lights on each one. I used two red, two green, and one clear string of lights. I'm normally strictly a clear-lights girl, but I thought it would help get the "ornaments" point across better!
Subscribe to:
Posts (Atom)


